First, the empirical method The empirical method is a method of checking and judging the technical condition of a part by observing, tapping, and feeling. Although this method is simple and easy, it requires the technician to have experience of various sizes, gaps, tightness, torque and acoustic direction, and its accuracy and reliability are limited. 1. The visual inspection method can see through the eyes and hands of rough parts, grooves, scratches, peeling (peeling), obvious cracks and breaks, notches, holes, and severe deformation of parts, wear and deterioration of rubber parts. Touch or check with a magnifying glass to check it out. For the wear of the gear center keyway or shaft hole, it can be tested with the matching parts to determine the degree of wear. 2. Percussive car parts of the shell, disc-shaped parts with or without cracks, riveted parts connected with loose, bearing alloy and the bottom plate is tight, can be used percussion listening method for inspection. Click on the part with a small hammer and emit a crisp metal sound, indicating that the technical condition is good. If the sound is husky, it can be determined that the part is cracked, loose, or not tightly bonded. 3. The comparison method uses the new standard parts to identify the technical status of the parts to be inspected compared to the parts to be inspected. This method can be used to check the free length of the spring and the length under load, the quality of the rolling bearing and so on. If the old and new springs are clamped together on a vise, the method can be used to determine the amount of spring force. Use the comparative method to check the spring elasticity 2. Measure the change of the dimension and geometric shape due to wear or deformation of the part, or cause the decline of technical performance (such as elasticity) due to long-term use. These changes are usually determined using various gages and instrument measurements. If the bearing hole and the shaft hole wear, usually with the matching parts for inspection, when loose, you can insert thick gauge inspection, determine the degree of wear, to determine whether you can continue to use; require a higher cylinder damage, apply The measurement of the cylinder or the inner diameter micrometer is performed to determine the degree of out-of-roundness and taper. Shaft parts are generally inspected with a micrometer. For the shaft with more uniform wear, only check the outer diameter, but for some non-uniform wear, check the ellipticity and taper. When measuring the crankshaft connecting rod journal, first measure on both sides of the journal oil hole, then turn 90 and measure again. The maximum value of the difference between the journal and the transverse section is ellipticity. The maximum value of the difference between the journal and the longitudinal section is the taper. The wear of ball bearings (ball bearings) can be determined by measuring its radial and axial clearance. Place the bearing on the flat plate so that the stylus of the dial indicator bears against the outer ring of the bearing, and then press the inner ring of the bearing with one hand, and the other hand reciprocates the outer ring of the bearing. The number of the movement of the hands is the radial clearance of the bearing. Place the outer ring of the bearing on the two pads and let the inner ring float. Place a small flat plate on the inner ring. Place the dial indicator against the center of the plate. Then push the inner ring up and down. The indicator on the dial indicator The difference between the maximum and minimum values ​​is the axial clearance of the bearing. The use of measuring tools and instrument inspection parts can generally obtain more accurate data, but it must be used properly. At the same time, the precision of the measuring tools must be carefully checked before the measurement. The selection of the measurement parts and readings must be correct. Third, the detection method 1. Immersion hammer test This is a simple method to detect hidden defects. During the inspection, the parts shall be immersed in kerosene or diesel fuel for a while. After removal, the surface shall be wiped dry and sprinkled with a layer of white powder. Then, the non-working surface of the part shall be tapped with a small hammer. When the parts have cracks, due to vibration, kerosene (diesel) immersed in the cracks seeps out, and the white powder at the cracks appears yellow line marks. According to the line marks, the crack position can be judged. 2. Magnetic flaw detection The principle of magnetic flaw detection is: using a magnetic flaw detector to magnetize a part. Even if the magnetic flux passes through the part to be inspected, if there is a crack on the surface, the magnetic lines in the crack will shift or break to form magnetic poles and establish their own magnetic fields. If the surface of the part is sprinkled with finely-grained iron powder, the iron powder is magnetized and attached to the crack, thereby revealing the location and size of the crack. When performing magnetic flaw detection, the magnetic force lines must be passed vertically through the cracks, otherwise the cracks will not be found. The iron powder used for magnetic flaw detection is generally 2-5 micron iron oxide powder. The iron powder can be used dry, but iron oxide powder is usually used, that is, in 1 litre transformer oil or low viscosity oil mixed with kerosene, add 20-30. Grams of iron oxide powder. After the part is magnetically inspected, it will leave part of the remanence and must be completely removed. Otherwise, iron chips will be absorbed during use, which will accelerate the wear of parts. With DC-electromagnetic parts, as long as the current direction is changed and gradually reduced to zero, demagnetization can be performed. Magnetic flaw detection can only check the location and size of defects such as cracks in steel parts, and the depth cannot be verified. In addition, since the non-ferrous metal parts, hard alloy parts, etc. are not magnetized, magnetic flaw detection cannot be applied.
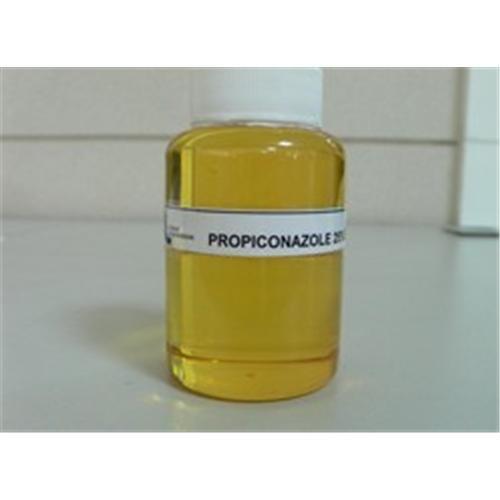
Propiconazole is used
agriculturally as a systemic fungicide on turfgrasses grown for seed and
aesthetic or athletic value, wheat, mushrooms, corn, wild rice, peanuts, almonds, sorghum, oats, pecans, apricots, peaches, nectarines, plums, prunes and lemons. It is also used in combination with permethrin in formulations of wood preserver. Propiconazole
is a mixture of four stereoisomers and was first developed in 1979 by Janssen
Pharmaceutica. Propiconazole
exhibits strong anti-feeding properties against the keratin-digesting
Australian carpet beetle

Agricultural Propiconazole
Agricultural Propiconazole,Difenoconazole Propiconazole,Propiconazole Based Agricultural,Agriculture Pesticide Propiconazole
Ningxia Bornstein Import & Export Co., Ltd , http://www.bornstein-agriculture.com

